

Microsoft adds a watermark to the bottom right of the screen reminding users that they are using a preview version of the software. If you are one of the many users that are annoyed by this constant reminder, this article is for you.
Over the years Microsoft have employed a number of different methods to print the mark. In the past I have seen hackers replace the cached copy of the wallpaper for an unmarked version. From my testing this doesn’t seem to be possible with the Windows 8.1 Preview.
I hate just copying someone else’s method, after all, how do you know it is the best if you haven’t tried something different. I also always stay away from automated programs that claim to remove the mark and I suggest you do too. I have seen versions that include adware and even trojans.
I was able to fairly quickly remove the top line of the mark but the bottom proved to be more challenging. I had to resort to searching the Internet for methods and have put the following tutorial together based on the best method that I have found.
Warning: I take no responsibility for any damages caused to your computer.
I have tested this tutorial on both 32 bit and 64 bit versions of Windows 8.1 Preview.
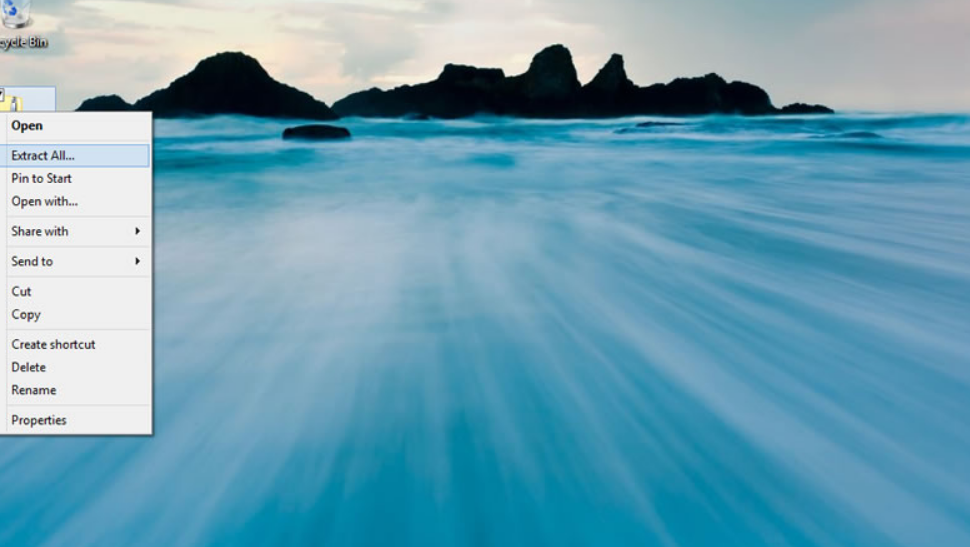
Step 1 – Download Zip File
Initially I was going to manually describe the process, but for simplicity I have bundled it all together into a single zip file. I did not write all the contents of the files but I have analysed them and they are all safe to use.
Step 2 – Intall_Take_Ownership.reg
Once you have unzipped the file, open the Install_Take_Ownership.reg. This will add the contents of the file to the registry. This step is required so that you have the correct file permissions to edit the .dll files in the later steps. It is also possible to change the file permissions manually if you don’t want to add anything to the registry (I did this while I was experimenting).

Step 3 – Take Ownership
There are two files that need to be taken ownership:
- Windows\System32\en-US\shell32.dll.mui
- Windows\Branding\Basebrd\en-US\basebrd.dll.mui
Right hand click on the files and select ‘Take Ownership’.


Step 4 – Copy Edited Files
Copy the replacement files that are located in the ‘Edited Files’ folder to overwrite their respective ones. If you get an error saying that the file is already in use, rename the file and then copy the new one.

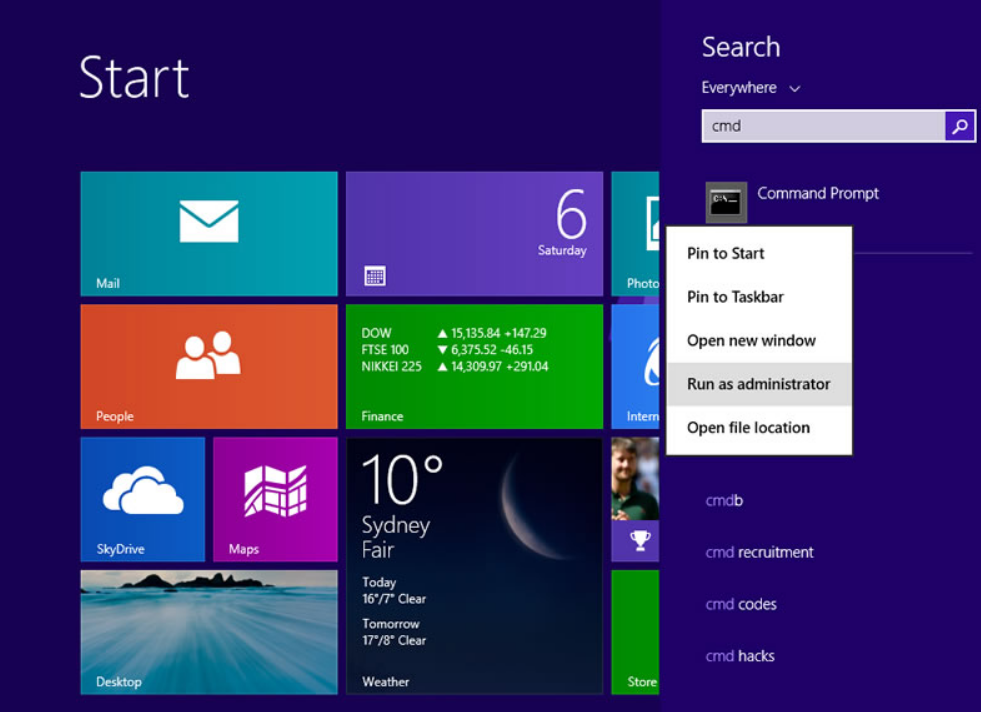
Step 5 – Open Command Prompt
Type ‘cmd’ into the start menu, right hand click on the first entry and select ‘Run as Administrator’.
Step 6 – Run mcbuilder
Enter the command and press the return key to execute:
It will take a few seconds to run.

Step 7 – Restart your computer
You need to restart your computer to apply these changes. Once restarted, you should see that the watermark has been removed.
Step 7 – Remove Take Ownership
In the same way that you added ‘Take Ownership’ to the registry, double click Uninstall_Take_Ownership.reg to remove it from the registry.

If you have followed the steps above you should have removed the watermark from the Windows 8.1 Preview. If you have any trouble here are a few things to try:
- Change the desktop wallpaper
- Replace the files in safe mode
What do you think of Windows 8.1 Preview? leave a comment below
Leave a comment if you have found an easier method to remove the watermark.


